1963 Jaguar E-Type OTS
The story of a ground up restoration of a classic "XKE" Jaguar roadsterRight Upper Wishbone Removed, Other Smallish Stuff (02 - 03 March 2003)
|
|
|
|
|
|
|
| Right Upper Wishbone Removed (02 - 03 March 2003)
Things have been getting too clean with the floors fitting and being sealed with POR-15. This weekend I turned to the front frame that we had removed long ago with
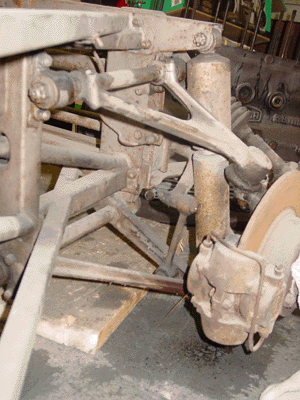
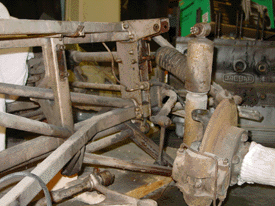
I focused on the right suspension system. Actually much of the work consisted of spraying penetrating fluid on the nuts and bolts that needed to be removed or loosened. These nuts and bolts have been painted the body color, and as a matter of fact the shock absorber (the original Girling) and the upper wishbone itself were the body color of the car. That's a very good indication that the car had been painted, since the original shocks were "Girling blue" and the upper wishbone was plated. I'm going to carefully remove the paint on both of these items to see what lies beneath the paint. To tell the truth, I have no idea what "Girling blue" really looks like. On all the photographs I've studied, I've never seen it. Depending on the shape of these shock absorbers, I might keep them and reinstall them. When I took ownership of the car, I did bounce it around a bit. The rear shocks were shot, but the front shocks seemed good still. By the way, the English call shock absorbers "dampeners." I was a little confused by the term when I was going through the shop manuals for guidance, and "dampeners" cause me to scratch my head a bit. But, of course, the name itself tells what the part does: dampen motion and "shock."
I followed the shop manual instructions for removing the upper wishbone, since I have never done this kind of removal before. The instructions were quite good, but there
was one problem with access to a bracket that holds the "fulcrum" of the wishbone onto the frame itself. The front bracket lies behind the shock absorber, and I found that
It would have been nice to remove the entire suspension assembly on the right, but some of the nuts and bolts are very much stuck. I figure I would treat them with penetrating fluid over the week and see if they will loosen up. Smallish Stuff
I am anxious to flip the car back to its normal state, since seeing the floors now has become tedious. I did some preparatory work to sealing the floors with POR-15, and
this has required a bit of an adjustment in timeframe. I was hoping to get the entire floor coated with POR-15 this weekend, but the problem was fitting the rear floor
stiffener. This piece covers an area of the floor that I definitely want to coat with POR-15, but that section becomes inaccessible once the stiffener is in place. As a
result, I have to POR-15 the section before placing the stiffener. This takes planning — and time. Everything is now set, and I am planning on having the entire
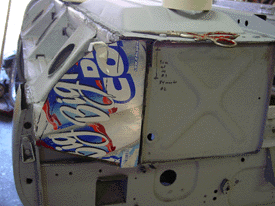
The front end of the inner sill (the piece that is part of the front bulkhead) still needs to be fabricated. Today I found the template I used for the corresponding piece on the other side of the vehicle. With a simple flip, the template works for this side as well. I fitted the cardboard piece to the area to see what adjustments might need to be made. None needed. I can cut this piece and fit it sometime this week in the evening. I've thought about calling one of these little chapters "The Car That Was Made Of Cardboard" — appropriate, since without cardboard from pop containers, the metalwork would have been much harder! |
 the front suspension and steering mechanisms intact. The entire structure needs to be completely taken apart so that the steering, the suspension assemblies and the
three-part frame itself can be thoroughly cleaned and, as the case may be, renewed.
 I had to remove the upper shock absorber fastener in order to gain access to it. This fitting had three very stubborn bolts that took a great deal of penetrating fluid
and many taps on the wrench to remove. I was careful not to be too free with my hammer, since replacing these pieces could be a real challenge. All the hardware is grade
8, however. And so, it is quite tough. The bolts themselves look untouched by the forty-some years they've sat. I'm guessing the a coating of paint may just have given
them some extra life.
 floor sealed by the end of the week.