1963 Jaguar E-Type OTS
The story of a ground up restoration of a classic "XKE" Jaguar roadsterFrame Removed, Footwell Repair (9 - 10 November 2002)
|
|
|
|
|
|
|
| Frame Removed (9 November 2002)
The front frame that holds the engine, the front suspension, and the bonnet was removed. Overall it was No Big Deal, though bolts on the left (driver's) side were rusted tight and had to be drilled off. The heads of the bolts had fused, though the threads apparently are loose. I can move the cut-off bolts with my fingers now. I suspect that I won't even need to worry too much about the assembly that attaches the frame to the "tub." Although much of the hardware is in decent shape, I think I'll be replacing all of the hardware when I reassemble the frame. 
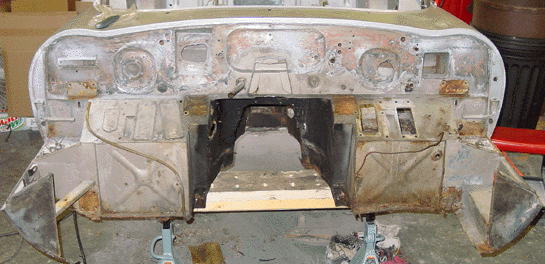
I took the frame off with the front suspension intact. I have to admit that I'm not thrilled with the prospect of dismantling the front suspension. But I did have to remove the frame in order to free up the body shell and make it easier to flip the entire body to fit the floor panels. The picture shows the front bulkhead half stripped. Over the course of the weekend, I managed to strip and sand most of the piece. I'm hoping that the weather holds so that I can prime the bulkhead and get some more POR-15 to lay over the primer as a sealant. I had other things to do than work on the car, but the removal of the frame didn't take very long. Footwell Repair (10 November 2002)
I took on more rust repair. This time it was the left side footwell cover that makes up part of the front bulkhead. (This section appears on the right side of the
bulkhead picture, since the picture is taken from the front toward the back.
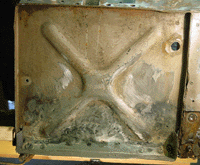
The fix entailed cutting out the section of the footwell that was damaged, spot welding a panel behind the front side of the piece, and then attaching a new lower section
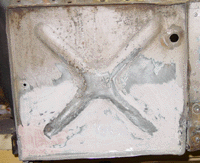
Perhaps I'm doing something wrong with spot welding, but I find that I often have a lot of grinding to do. And then sometimes I have little indentations or voids where the metal seems not to have stayed. I chalk it all up to the poor visibility. Put a welder's mask on and see how much you can make out, even with blinding lights. But after the grinding and some touch-up welding the piece seemed pretty presentable. I used an angle grinder to do the smoothing, but of course there always are imperfections and ripples. A light coating of bondo smoothed out the surface.
It is perhaps a realization that creeps up on all car restorers: Bondo seems less and less despicable stuff. I suppose that's healthy, so long as I don't fall to the Dark Side,
The footwell repair took the bulk of the day. Now I can see why this piece is bought and replaced rather than fixed. A replacement costs about $45 (US) or so, and I've seen them go on ebay for $25 (US). What's my time worth? Well, at least this footwell is original, mostly. It's worth noting that the main rust damage on the front bulkhead was in the vicinity of the battery. As a matter of fact, I'll have to build the battery compartment pretty much from scratch, since the HVAC Man did his trick with 26-gauge sheet metal and pop rivets on the area holding the battery. Also, we noticed that a diagonal slit was made along the left outside sill to insert more of the chintzy sheet metal — mainly on the front third of the outer sill. More pop rivets covered with bondo, too. What a treat! We were going to take off the left side outer sill, but we never got around to it. That can wait for another weekend. I do not believe the left sill will have as much corrosion uniformly along the bottom, though the front end of the sill has some damage. |
 Thus, the directions get reversed. You always refer to the sides of the car as though you were
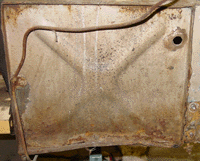
in the car seat, looking forward.) The piece was bent on the bottom, and corrosion had significantly weakened the metal up a little less than an inch. The picture clearly shows
the bend, and some rust is visible, though much of the rust is surface rust and not a concern.
 of the footwell with spot welds and lap welds. This lower section has a tab that angles out from the front, and it is part of the way that the floors are attached. As we did with the left inner sill,
we used 18-gauge steel to fashion the pieces. It's not too tough to cut, but it is stiff and resists the bending. To make it easier to grab and bend, I made the tab about
three-quarters of an inch big. Although the final product doesn't need that big an angled tab, we can cut or grind off the excess after the floor panel is in place, too.
 and start doing everything with bondo.