c h r o n o l o g i c a l
g u i d e
> Year 1 Year 2 <
> Year 3 Year 4 <
> Year 5 Year 6 <
> Year 7 Year 8 <
> Year 9 Year 12 <
fetching & dismantling
sandblasting & evil rust
right "b" pillar
fixing right inner sill
basic body repair, por-15
frame removed, footwell repair
hole fixed, car flipped, etc.
sill stiffeners, rear bulkhead, etc.
various small parts
left sill, added stiffener, etc.
- lousy weather
trunk floor (reprise)
right floor, left sill, etc.
left floor, wheel well, etc.
right upper wishbone
floor done, car righted
rack, front frame, evil rust
left door cleaned & fitted
right door, right suspension
bonnet, part 1
bonnet, part 2
bonnet, part 3
bonnet, part 4
bonnet, part 5, etc.
bonnet, part 6
bonnet, outer sill, etc.
lots of stuff
left side, bonnet internals
frame, bonnet attached
engine stand, oil pan removal
pistons removed, sanding
sanding, final filling
color, frames, primer
brushed primer test
2nd coat primer
holiday greetings!
finish prep, detail on dent fix
spraying primer
winter chores
1. undercoat, plating prep
2. plating, spraying color
bonnet, plate prep, cylinder head
cylinder head paint, bushes
plating saga
front frame, suspension, part 1
front suspension, part 2
front suspension, part 3
priming and painting
bonnet, part 7
painting color!
boot lid, steering wheel
gas tank
winter chores
1. firewall sundry
2. front suspension
3. steering setup
4. master cylinders/pedals
5. the rest
data plate screed
winter to spring
1. irs rebuild
2. trunk floor, harness
3. data plate (again)
data plate, door, headlights
dash vinyl, crosshatch aluminum
windshield, right door
interior, "widget"
chrome parts!
door handle details
rolling chassis
molasses rust removal
electrical, part 1
bores, thrust washers
new engine!
head differences
block differences
compression ratio
engine in place!
alternator
catchup & photos
it runs!
setback and brakes
darned close & engine diffs
driven
top and seats
driving and little stuff
|
|
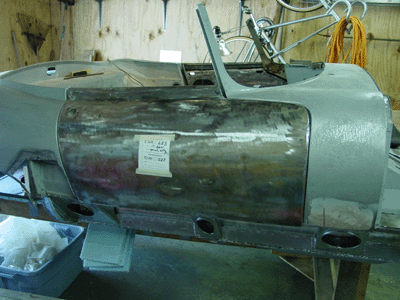
| Right Door Cleaned & Fitted
Removing the guts of the right door was considerably easier than doing the left door, since I had already been through the process once. In a nutshell, this is the
 process: 1. Remove the window crank and the door latch handle by pushing the escutcheon away from the handle and pushing the lock pin through the hole. Remove the
door panel 2. Remove the lower door hole access plates by drilling out the pop rivets that hold them in place. Scrape off the rubbery weather seal with a knife.
3. Remove the hardware attaching the chrome window rails from the top section of the door and from the two tabs inside the panel assembly at the bottom
of the door. 4. Slide the window rails out through the top of the door carefully. 5. Remove the bolts and screws that affix the latch mechanism and the
window crank mechanism to the door panel assembly. 6. Carefully pull the window glass through the top of the door and, after the glass is completely free, remove
the window crank mechanism. You will have to adjust the crank mechanism to pull the glass free without binding the mechanism in the door panel assembly. 7. Remove
the bolts that hold the exterior door latch handle. This is done inside the door panel. Then unclip the door latch mechanism from the inside of the latch handle.
8. Remove the handle from the outside of the door and then the latch assembly through the access holes in the door panel assembly. (You can remove the anti-drum
material any time you can get a hold of it.)
process: 1. Remove the window crank and the door latch handle by pushing the escutcheon away from the handle and pushing the lock pin through the hole. Remove the
door panel 2. Remove the lower door hole access plates by drilling out the pop rivets that hold them in place. Scrape off the rubbery weather seal with a knife.
3. Remove the hardware attaching the chrome window rails from the top section of the door and from the two tabs inside the panel assembly at the bottom
of the door. 4. Slide the window rails out through the top of the door carefully. 5. Remove the bolts and screws that affix the latch mechanism and the
window crank mechanism to the door panel assembly. 6. Carefully pull the window glass through the top of the door and, after the glass is completely free, remove
the window crank mechanism. You will have to adjust the crank mechanism to pull the glass free without binding the mechanism in the door panel assembly. 7. Remove
the bolts that hold the exterior door latch handle. This is done inside the door panel. Then unclip the door latch mechanism from the inside of the latch handle.
8. Remove the handle from the outside of the door and then the latch assembly through the access holes in the door panel assembly. (You can remove the anti-drum
material any time you can get a hold of it.)
By the way, the right door was in better shape than the left. There were no rust holes, and what rust there was stayed on the surface. It hung a little better than the
left door, too. We did a little channel work on the left door, but the right door didn't really need anything. I'll probably get fussier, though, and mess with the
fit a little bit.
Right Front Suspension Partially Disassembled
We removed the right front suspension intact a while ago, but it became time to disassemble it. I would like to have the wishbones, the fulcrum shafts, and other parts
nickel plated, so we needed to completely take the thing apart. Also, many internal parts will need replacement, such as the brake cylinder rings and rubber parts and
 the wheel bearings. We were able to get much of the assembly apart, but I decided to bring the tough-to-disassemble parts into a local British automobile dealership
and service shop. They had the tools and the experience with the items to take them apart completely, and I didn't have to puzzle over it.
the wheel bearings. We were able to get much of the assembly apart, but I decided to bring the tough-to-disassemble parts into a local British automobile dealership
and service shop. They had the tools and the experience with the items to take them apart completely, and I didn't have to puzzle over it.
I have already the retrieved the disassembled parts from the shop (I'm writing this on 23 April), though I haven't looked at the work yet. We have another suspension
assembly to take off the front
frame, and I'd like to get it into shape for plating. It's still not clear to me how much nickel plating will actually cost. This is not super smooth chrome plating for a
bumper but much rougher, and I'm hoping it won't cost too horribly much.
|
|
