| I know. Many will wonder why in the world I would start on the interior before having the greasy bits installed. The answer is (mostly)
straightforward. First, I'm a little impatient. Second, I'm not quite ready to have the Big Mechanicals go off somewhere.
I don't have a clear plan for the engine and the transmission, and I'm torn between being my own "general contractor" or using a reputable engine rebuilder
to just do the job from beginning to end.
So, the interior sits there waiting, and I can do it. I'm posting this report well before I'm finished with the interior, but it's been
a long time since I've updated the site. I figured this epic of interior installation should be begun in medias res.
Vinyl & cloth. For me, probably the most excruciating part of the interior was settling on a color. I had always intended to install a standard color
for the interior, in spite of intense lobbying from my sons to go with black which was not a standard interior color with Opalescent Dark Green for
the 1963 E-type. The "correct" colors for the interior were Beige, Tan, Light Tan, and Suede Green — and those colors were constant over the life
of the Opalescent Dark Green body color (from 1961 to about September 1967, as I interpret the data). However, other colors could be special ordered.
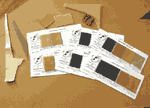
I gathered samples of the various colors from different vendors, and I settled on using World Upholstery & Trim as my source. They had provided the vinyl
covering for the dash and instrument panels, and I was impressed with the quality of the vinyl (and that, I have learned, can vary widely from source to
 source). They have also been easy to work with. They also do E-type interiors to order. This is important because I am not willing to try my hand
at doing the seats, and I wanted to make sure that the vinyl color and the eventual leather hides for the seats would fit well together. Also, I
had planned to have the moquette (aka "body cloth") consistent on the seats and on the couple of sections where it covers the interior. I ordered
all of the vinyl, moquette, and carpet from World Upholstery, and should they eventually do a seat kit for me, the materials will be consistent.
If I have someone else do the seats for me, I can get the materials from World Upholstery and maintain the consistency nonetheless.
My color choice? Tan. The specifics of what I ordered from World Upholstery follow.
| ITEM |
COLOR |
ITEM # |
LENGTH |
| Vinyl (width 54") |
Tan |
4004 |
4 yards* |
| Leather hide |
Tan |
4104 |
Not ordered |
| Moquette (body cloth) |
Tan |
262 |
1 yard |
| Carpet (backless, width 60") |
Palomino |
5113 |
2 2/3 yards |
* I could have used another yard of vinyl, just to make it easier.
Costs of the products vary, with the vinyl coming through around USD $35/yard, the moquette about USD $75/yard, and the carpet around USD $65/yard.
Quantities of the materials are of course based on where it all goes on the car, and this seems to have changed through the history of the Series 1 roadster.
The crossmember on later Series 1 cars had carpet, while earlier cars had vinyl covering. For 1963, as far as I can tell, moquette was only on
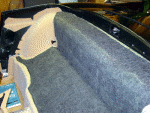
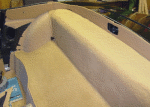
seat backs, behind the seats on the "lower rear bulkhead," and on the wheelwell arches. Carpet covered the upper sections of the rear bulkhead,
but I have also seen Series 1 cars with vinyl (or perhaps hardura) covering that area. I decided to use vinyl on the floors below the
seats, though I have seen hardura, carpet and moquette in that place. Vinyl, I think, will be easier to keep clean (and is, in any case,
obscured from the view of people who might care about such things). Vinyl covers the crossmembers on this car, as I believe it came from the
factory.
I decided not to differentiate the vinyl from the hardura sections of the interior. This means that the "outside-facing" section of the
"scuttles" and the area surrounding the chrome bonnet releases have vinyl installed rather than hardura. I wasn't impressed with the fit of the
hardura that came off of this car when we dismantled it (though, given the state of the car when we got it, that's probably not saying much).
Hardura in the scuttle area needs to wrap around a 90° corner, and it is stiff enough that it doesn't do that very well. The hardura panels
were rounded over the corner, and the sections adjacent to the corner pooched out. At any rate, you'll see that there's no hardura on my list of
materials. I do think that World Upholstery stocks it, if you want it.
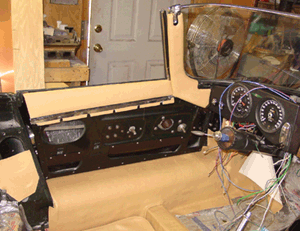
Felt & padding. In winter 2004, I lined the interior with rubber-backed foil, with the exception of the inner sills above the groove for wiring
and the wheelwell arches. Atop that lining, I cemented 1/8-inch thick felt pad that has a Mylar-type plastic face on one side. It's actually
flooring product made by Armstrong. I also used regular old felt found in fabric stores for the facing pieces that extend from the doors to the rear
interior light. Thickness of that material isn't much more than a millimeter or so. Padding for the wheelwell arches and the windshield post (the A-post) was
5/16-inch foam. This material has a cloth facing and is actually sold for headliners. I also have half-inch foam previously used
on the dash. I used it as the foam for the top portion of the door panels.
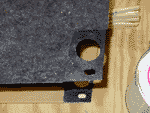
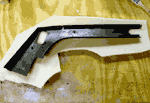
Hardboard door panels. Well, the product comes from Lowes and it's used as a chalkboard. Exactly the same thickness
as the door panels that came off of the car, one side has a painted coating for marking up with chalk (the green board). A similar product is available for use
with special whiteboard markers. The product I got is from Georgia Pacific labelled "G. P. Chalkboard Wainscot." I redid the panels for the trunk/boot with the same
product, though with a smooth white coating for whiteboard markers. You can cut it with a razor knife. The 48" x 32" sheet cost well under USD $10, and after cutting
out the door panels I still have extra for use on other projects.
Fasteners, glues, and cements. Certain sections of the interior are fastened
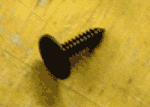
to the body with clips. These originally were spring steel. I chose to use nylon "push" fasteners instead. For the facing on the "B"-pillar
I've used Ford-style 1" (or thereabouts) fasteners and for the "A"-post facing, I've used GM-style half-inch (or thereabouts) fasteners. I haven't
fitted the door panels yet, but I believe the 1" fasteners
will work there as well. If you plan on reusing door panels, you probably won't be able to switch from the original fasteners, since
the holes for the original fasteners are slightly offset, perhaps by as much as a quarter inch. I could use the new nylon fasteners
because I have had to redrill holes for the fasteners in any case, since I made new panels. The original clips seem to fasten well, but they
also appear to tear up the hardboard of the panels.
Some people used spray-on contact cement, but I haven't had altogether wonderful experiences with it staying well
glued. Instead, I've used the "gel" formula of Weldwood contact cement. The gel formula is easier to use than the
"regular" paint-like formula, especially on surfaces like foam, where you want the cement to remain on the outer surface. The gel formula is not as easy to apply as a spray,
but it works with a little practice. I've also come to appreciate hot-glue guns, especially for attaching vinyl tightly to make smooth
curves. With a squirt of hot glue and a bit of pressure, the vinyl is attached quickly and neatly.
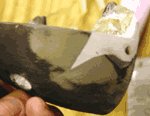
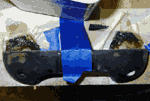
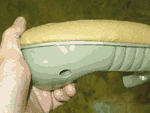
Armrest repair. The plastic sections of both armrests were cracked, one of them quite
badly. I figured that I would try repairing them before ordering reproductions. They're actually quite complicated structures, with internal passages
for fastening the armrest pads (which are secured on metal frames) and for fastening the armrest to the door. Two plastic "ears" sit between the
door panel and the armrest pad sections, and these are just really designed to break off, since they sit in a place where any upward pressure on the
armrest will pivot and press on the thin plastic walls. All of these "ears" were cracked and broken on my armrests.
The pictures on this page show the repair process and the extent of the breakage. I did the repair in two steps: a thin coating of polyester body
filler for the outer portion of the armrest and a reinforced fiberglass coating for the internal structure and reinforcement of the repair. If I
were to do the repair over, I would not use the polyester filler, even though it shapes nicely. The filler didn't bond well to the plastic, and I
suspect that over time it will fail. The fiberglass reinforcement is a little harder to bring into nice shape, but it bonded well and did a good
job of reinforcing the whole structure. Since the channels are the weak points of the plastic molding, I went ahead and reinforced even the channels
that had not (yet) weakened or cracked.
Color is a question. The armrests that came on my car had been painted a semigloss black, and I was suspicious about the color. The plastic was a neutral
tan-grey color. I suspect, though I'm far from certain, that the armrests were originally fitted without painting. Jaguar may have had a couple
of colors (black and this tan-grey color, perhaps) that they used for the different interior colors. I tried to find period pictures of a tan interior,
but I discovered what other people have already noticed: even Jaguar's own brochures recycled pictures from earlier models. The brochure I looked at
from 1963 included interior shots that seem to be of earlier model years. The pictures don't include armrests at all; and that, I'm told, is a hallmark
of very early year models of the Series 1 cars.
At any rate, I matched the color of the plastic — believe it or not, Krylon "Camouflage" (flat) with a clearcoat over it. I'll continue trying to find
original pictures as time allows. The color is all right with the tan vinyl, and I think it's truer to the original color combinations than a sprayed color
exactly matched with the vinyl.
Carpet and pad. A little note on the carpet and what lies beneath it. I used quarter-inch felt
as a pad under all carpeted surfaces, and the cutting of the felt provided the basic templates for the carpet itself. Areas on the body that I expect
to be sources of noise (such as downward-facing surfaces or cavities like the IRS section) had the aluminum/foam covering, the felt/Mylar covering, and the
felt pad covering. Together, these pieces make up about a half-inch thickness.
The surged edge of carpet I sewed using our trusty Kenmore sewing machine. The edging is vinyl. I was wondering if the sewing machine would work on carpet
as well as it did on the vinyl pieces that needed a surged edge. It did, so I didn't have to go to an upholstery shop even for that little bit of
work.
Wrong style grab handle! Yikes! I don't know if I'm going to try to find a more "original" replacement in any case,
since I actually like this style better. But, that variance from the original just doesn't sit well with me still. I might try to find someone who'd
be willing to trade. Now, where is Stephan Roundy's email address?
|
Thumbnails
Mouseover for info (javascript support required)
Click for larger image







|

