|
Top
David Boger (proprietor of everydayxj.com) got a convertible top frame in a deal for some old Jaguar parts back in fall 2009. I picked up the frame from him on my birthday in October, and I fetched it months later
(the end of March 2010, as a matter of fact). His business and his place have really expanded, so the XJ6 crowd is now especially well served. He had (and still has) some E-type parts, too. I picked up the frame with the understanding that it was lacking one of the bows, the front one specifically — or so we thought. Since I had pieces of the original top frame, I figured that I would be able to fashion a new bow or otherwise get one. However, it turned out that the top frame was intact and was merely an early example. The early top frames didn't have three bows, but rather just two. I'm not exactly sure when the third one was added, and Thomas Haddock is silent on the additional bow, as far as I could tell — which makes me a little wary of the truth of the matter. But on this top frame, there was no means of attaching a front bow, and there was no violence done to the tubing where a bow would have fit. The front pan-shaped metal edge of the top frame fit perfectly, and so the whole kit must be there.
I removed the old Jaguar grey and resprayed it, cleaned up the chrome bolts and supplied the few that were missing, and then I set it into place. Tops are easy to get, and I got mine from an eBay vendor. I decided to go with the canvas-like material called "Stafast." Instructions for installation are on the web, and I went with the ones that were put together by "Andyzak" and published on E-type Lovers (http://www.xke-lovers.com) at http://www.xke-lovers.com/ragtop.htm. Follow the instructions and everything goes fine. The only trouble I had was affixing the front chrome trim at the ends, where the curve of the front seemed to work against the clips. It took some wrangling, but I got it on.
Interior (including heretical seats!)
The interior project has gone on for years, and I have an entry that goes back to "Fall/Winter 2005/2006" when vinyl and moquette were applied. As with everything in this extended restoration, I have thought and re-thought, decided and re-decided (and then decided yet again!). The interior probably best exemplified the consideration-reconsideration dynamic. Some, I suppose, would call it waffling.
I waffle on leather and commit heresy.The car seats are a case in point, and the waffling arose from the greater context of this restoration — a couple other cars. The old E-type wasn't the only Jag in stable, so to speak. I owned until recently an XJ8L, and my daily driver is an XK8, which of course, I bought because it takes design cues from the E-type. Both have leather pretty abundantly. I found that I am not a really big fan of upkeep of leather. The XJ8L interior was nice, and the leather was supple and soft, but I noticed over just a few years that it discolored in wear, probably because colors or dyes wore off? The driver's seat got a bit of this crumply look, too. And the interior seemed to need babying that we frankly couldn't easily do, since our vehicles have to trek off to the barn and suffer from the insults that just come with living out in the toolies. The state of the leather in the XK8 is, to put it in a word, awful. (Now, admittedly, this is a daily driver that sometimes hasn't had the leather conditioner applied as often as might be necessary.) I have gotten to the point that I have re-dyed the front seats, after making an attempt to repair cracks and holes in the driver's seat cushion. The repairs have held up, mostly, and the color is ... er, OK. But, in fact, I hate the leather seats in the XK8, and they're coming out for a recover when I retire the car from daily use. My wife Arlene thinks I should just get rid of the XK8, but I have grown fond of it despite its deficiencies.
As an aside, I note, with some dismay, that the leather interior of my eldest son's VW Passat (an older car with higher miles) is in great shape. I don't think that's all a matter of exquisite care, either.
This is all to say that I was less than enamored by leather due to my experience with other cars. The original plan was to get leather seats for the E-type and have them installed by a professional. I got shaky on that decision, though. I don't want to futz with leather and just watch it degrade pointlessly, as seems to have been my experience. And, though many people get all Ricardo Montalbon about leather, I have no trouble at all with good vinyl. Not the chintsy brittle stuff, mind you, but the "pure Corinthian vinyl" that graces luxury cars — and holds up better than the leather.
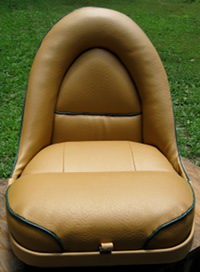
So, yes, the seats are heretical vinyl. Not leather. Thank God, I might add.
A second consideration was that my seats had to be special, with green piping. This is actually not too much of a problem, it would seem, since the leathers are not mass manufactured and then piled up in some warehouse somewhere as inventory. They are cut and sewn to order. But the piping issue introduced a level of complexity to an order that wasn't welcome — at least as I interpreted the conversations I had. And, when I broached to topic of would-it-be-possible-to-use-high-quality-vinyl ... well, that was too much. One well intentioned seat provider said, "No." That was the end of the matter.
Now, I might be demanding, but I do strive to be courteous. I didn't get the feeling I could get what I wanted from the Usuals on the West Coast. At least my interactions didn't inspire confidence. So, I figured, I'd go with the locals. There are two promising upholsterers in the area, and I visited them both. One has a great reputation for late model cars. Aaron highly recommended them, saying that they were quick and the work they did met or exceeded expectations. Probably so, but there was no enthusiasm for doing seats on an old beast like a 1963 Jaguar E-type. Kits only, the fellow said, and be sure that you show up with molded seat cushions. Otherwise, no go. No cutting, no sewing. The other upholsterer had done 1950s and 1960s American cars, and his work seemed quite good. I met him in front of his shop, and as he emerged from his car he carried a large pot pipe, which didn't exactly inspire confidence. Still, he and his group seemed competent, and they were working on the Saturday I visited. We went through vinyl sample books together, and I thought there was a possibility. Alas, things moved toward the nebulous, and I didn't want to be stuck with an unending job and interminable waiting. I'd gone through that kind of thing before.
So, I asked myself, what about doing it myself. I had most of the templates, the seat cushion notwithstanding. I never done this kind of thing before — heck, I've never run into trouble with this kind of project before. What could possibly go wrong?
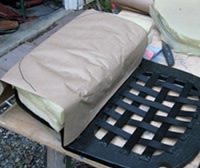
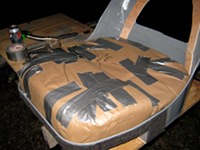
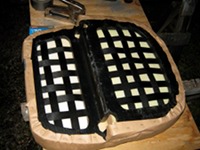
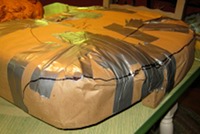
Seat cushion templates and "visual aid." Actually the seat cushion was a problem, since I really had little idea how the pieces all fit together. That problem, of course, was resolved with a faint and flexible cousin of the cardboard used to template many of the body parts that had rusted away. Regular old "craft paper" from the paint section at Lowes served as a template substitute for the vinyl. Certainly the stuff isn't as flexible or forgiving as quality vinyl, but handled with care it does the job. I took a bunch of the stuff, after having built up the foam I felt was appropriate, and a little duct tape (it does everything that WD-40 can't!) and fashioned rough panels that served well as templates for the vinyl pieces.
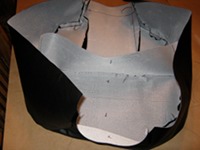
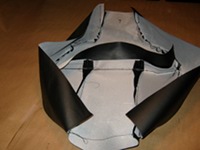
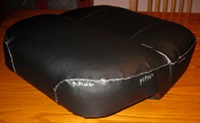
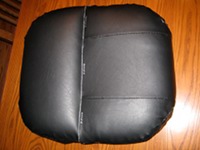
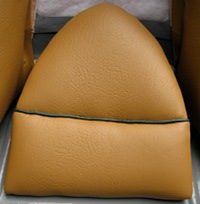
It was a matter of slicing up the paper after the fit was about right, and then using the paper pieces as crude templates for the pieces. Now, I wasn't that confident that the process would actually work. (At the time I was doing the craft paper work I had expected to ship off the templates to the upholsterer who was then going to be the pot smoker.) In order to see that a real cushion would come from the templates, I used some old black vinyl to create a cushion cover that would show the viability of the templates. I had intended to deliver the vinyl test to the upholstery shop, as a matter of fact. It worked quite well — better, in fact, than I had expected. I had not put in the piping, though I drew in the seams where piping would be placed. The key question in my mind was the method of separating the front foam bulge from the back part of the seat foam. There is this piping that runs laterally about midway between front and back, and it is slightly lower than the face of the cushion. A depression, actually, running along the offset join of the two levels of the cushion's plywood frame. I accomplished that by creating a tab that could be stapled to the plywood, drawing the lateral lower. I had split the cushions in my design into a front cushion and a back, so attaching the tab was easy.
The chintzy black vinyl model was actually a nice visual aid, but it also turned out to be a good dry run. As time went on, and my doubts mounted about upholsterer option number two, I pondered doing the work myself. My wife and I were talking about the next steps with the seats one evening, and I told her what I was thinking, half to test the thought with her. She said she was wondering the same thing, especially after she inspected the cushion I had hand-sewn as a test.
So, I dumped upholsterer option number two, and took the task on myself.
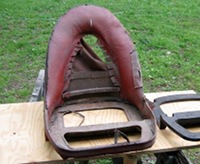
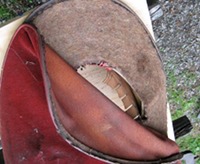
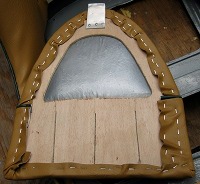
Back arch foam and the back inset piece. My original plan was to deliver the raw vinyl material and the two seat shells completed with wood strips. Foams for the cushions I had planned to do, but the foams on the seat backs I was going to leave to the upholsterer. I used the remnants of the wood strips on the old seat shells as a guide, and I fashioned the strips out of 1/4-inch plywood. I glued and riveted the strips onto the shells. A piece of cake. Foam for the cushions and for the arch on the seat shell was fashioned from two-inch foam, with the cushions made from a stack of two of these for a total of four inches of foam. I used batting material as a cover over the foam, which makes it easier to get the surface of the vinyl smooth — besides adding a bit of comfort. The foam arch that I took off the old seat had been curled over a felt core that was laid in the center of the arch on the seat shell. Basically, the foam was glued on each edge, and the edge had been tapered so that the face of the foam arched over the felt core. Looked a little putzy, I thought. I just used contact cement to glue the square-cut foam to the seat shell, and then I cut an angle off the outside edge along the seat shell's arch. The foam was thus crudely tapered toward the edge. Batting and the pressure of the vinyl rounded things out in the end. The back insert that fits behind the cushion uses one-inch foam.
The back insert piece has a plywood backing to which the foam and vinyl or leather is attached. The "skins" are stapled into the wood with the foam pieces floating beneath them, unglued from the wood. I riveted an aluminum tab at the top that slips between the moquette and the felt behind the seat. The tab holds the top of the insert in place. I believe that people must have attached the low end of the insert as well — probably to the curved piece of wood that is behind the bottom part of the insert. I chose to let the cushion hold the piece in place, so for all practial purposes it's "floating" in place. I believe Classic Jaguar uses a plastic sheet of some sort for the backing, and that makes some sense. The inset has to be somewhat pliable, since it curves on both sideways and vertical axes — a bit tough to accomplish with plywood, since the laminations are grained and will complain one way or another. I ended up cutting three slits in the lower half of the plywood backing, and that allowed the part to conform to the shapes more easily.
The other stuff. I deviated a bit from the layout of the wood strips that are at various places on the seat shell, too. The lowest attachments on the seat shell — basically, anything attached to the inside of the seat shell that was below the seat cushion — I glued. So the curved wood strips along the inside bottom edges of the seat shell are absent. The strips there didn't seem to have much of a point in my view, and contact cement is easy to apply and use.
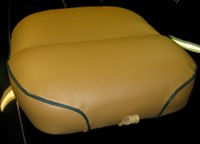
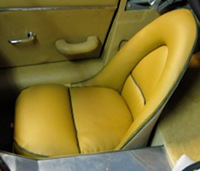
Assembly is quite easy once you figure out how everything fits. I think a few pictures will do most of the explanation.
I got the vinyl from World Upholstery again. Although they offer leather that is Connolly-like in grade and feel and match with suggested Jaguar colors, I didn't go that route. I chose instead a Mercedes-Benz vinyl, number 349 in their catalogue. Once again, the World Upholstery folks have been helpful and responsive. Here are the codes, but note thatn the "dark green" didn't come from World Upholstery. I got it locally, and I suspect it's a regular old whatever-is-in-the-warehouse brand.
| ITEM |
COLOR |
ITEM # |
| Vinyl (Jaguar or Porsche, width 60") |
Tan |
4004 |
| Vinyl (Mercedes-Benz, width 60") |
Bamboo |
349 |
| Moquette (body cloth) |
Tan |
262 |
| Vinyl |
Dark Green |
unknown |
Piping is actually interesting stuff. For the core of the piping on the aluminum console, I used a stiff polyurethane product — basically, weed-eater cutting line. For the seats I used the Real McCoy that I obtained at the regular old fabric store in Durham, nearby. It is just loosely braided cotton rope, specified to width. I got the quarter-inch stuff, and it was very easy to work with.
|
Mouseover for captions!
|

