
1963 Jaguar E-Type OTS
The story of a ground up restoration of a classic "XKE" Jaguar roadsterPrimer, Block-Sanding, Coat 2 (29 October - 2 November 2003)
|
|
|
|
|
|
|
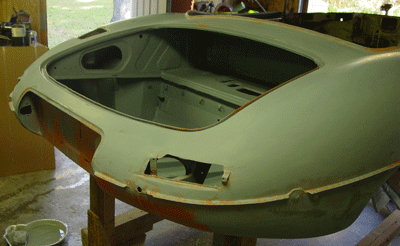
| Update: November 12 — It hardly seems worth an additional web page, so I didn't add yet more pictures of the same old blocking. The focus was on the left door, and I was committed to conquering its waves. The blocking took all of the working weekend, amounting, I would imagine to a good ten-to-twelve hours. I noticed on Bill McKenna's website that he spent 25 hours on his left door, so I figure that my work is about in line with his. There's still another coat of primer to go on it, and I don't know how many hours I spent working on it before this past weekend. As Bill says somewhere on his web site, it's a wonder that people can actually make money doing a decent restoration. The hours required — and from skilled people, too — are formidable. Speaking of Bill, I bought a replacement left frame from him. It was good to see his paint job in real life, at least a small portion of it. I've not done anything with the frame yet. I figure that can wait until I have the car body primed. Second Coat of Primer
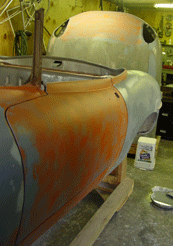
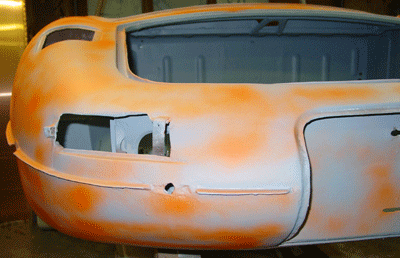
The car was turned into a pumpkin for Halloween. After the second coat of Tie-Coat Primer was good and dry, I put on another guide coat of flat spray paint.
It's probably worth remembering that the point of doing multiple coats of high-build primer isn't so much to coat the surface evenly with a thick coat. It's
really intended to allow you to even out low areas and obscure high areas, though of these two, I think that high areas are problematic. So in effect, you end up
sanding most of the high-build primer off of the car. You leave a reasonable amount of primer on to assure a good bond of the topcoat to the surface. The temptation
I get the feeling that this is really an art. And I also realize that good body work is worth the money people spend for it. It is labor-intensive and experience does count. (Too bad I have so very little experience!) The second coat pretty clearly tells me that you really can't spray the final primer coat and expect things to turn out all right. Despite my care while brushing the second primer coat, blocking it was complicated by the fact of the brush strokes. I found myself reblocking sections that had slight ripples from brush strokes, and I believe those areas would have been flat and ready for paint without the brushing. As a matter of fact, I think first coats are fine to brush, but probably not second coats. For this priming of the car body, I will complete a second coat and second round of blocking the parts of the body that appear "from the curb" — the external sections of the body shell and the bonnet. The internal sections of these parts will get a single brushed primer coat and blocking. This includes the trunk (or boot), the firewall (or front bulkhead), the interior of the car, and the inside of the bonnet. I will probably spray color in the trunk, the interior, and the inside of the bonnet at that point. After all of this is done, I will spray a final coat of Tie-Coat Primer as smoothly as possible over sections of the car that are not already sprayed with color, followed by final blocking of those surfaces. Of course, I could spray color on everything at once, though I am thinking that I'll still have to spray color on the bonnet in at least two sessions, since I want to coat the inside of the bonnet thoroughly. This really means that the inside shell without the internal panels will need a separate spray session. The inside panels and the front valance (the lower "mouth" section) can also be painted separately. Once everything is together, another coat of color is in order. Once again, the bonnet seems the complication. I avoided doing the doors until I feel confident that I have a few more blocking tricks in my repertoire. I applied a bit more primer to a couple of low areas on the rear wings, and blocked them nicely into shape. Perhaps that tactic might help should I run into some irregularlities on the doors. I think that the doors are challenging because they don't have the curves of the wings and the rest of the body. They are almost a pure tubular shape, and it seems difficult to get them just right. I also primed the trunk lid. A couple of closing shots show where the blocking stands at the end of the weekend.
|
 I took this picture after I happened to see
 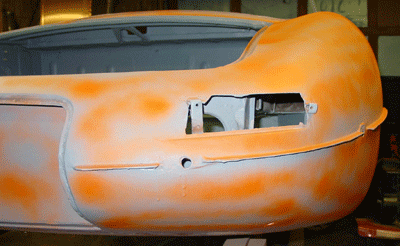 is to block the car a bit too little, leaving more than is needed to prepare the surface.